Way back in 2018 we put up a post entitled “Choosing the right lenses for your safari”
Even now, after 5 years and some amazing advances in camera technology, it is still the post that draws the most comments so we thought that it would be a good idea to revisit this subject.
Probably one of the most frequent questions we get asked by clients is “What lenses should I take on safari?”
This question is not limited to first timers either; because the equipment you need to take depends very much on where you are going and what the conditions will be like. Photographing rhinos on the plains of Kaziranga NP requires a different approach to photographing Sloth Bears in the forest at dusk, and photographing birds is very different to photographing elephants.
So how do you make the right selection?
Of course there is an assumption being made here; that you have a variety of equipment to choose from. The dilemma of having more equipment that you need or want to carry on any one safari is perhaps one that applies only to those DSLR users with a selection of lenses and accessories.
If you’re an enthusiast who prefers the convenience of a bridge camera then life is much simpler.

Bridge Cameras
Let me say right away that there is no intention here to heap scorn on bridge cameras. The convenience of having a zoom lens that covers the range from 24mm to 1400mm cannot be overstated.
How many times have those of us lugging a 15kg backpack full of gear looked enviously at compact cameras that have it all covered.
The 2 standout bridge cameras at the moment are the Sony RX10iv and the Nikon Coolpix P950 or P1000. Both can shoot RAW.
The Sony has a range from 28-600mm, the Nikon P950 covers 24-2000mm and the P1000 24-3000mm. If you want the ultimate on longe range shooting then one of the Nikon Coolpix is hard to beat. If you are happy with a more modest zoom range but want the best image quality a bridge camera can offer, then it has to be the Sony.
Of course bridge cameras do have some limitations:
a smaller sensor size means that the performance in poor light conditions is, for the most part, not outstanding
because every function is battery operated, battery life can be short so you’ll need to carry several spares.
But in good sunny conditions almost all modern bridge cameras are capable of producing fine images and if the images are going to be used mainly for posting online, the quality is absolutely fine.
DSLR & Mirrorless
But, for all the convenience of a bridge camera, most serious photographers prefer the versatility of a DSLR. (Digital Single Lens Reflex). In recent years many photographers are choosing to use Mirrorless cameras rather than DSLRs.
Both DSLR and Mirrorless cameras use interchangeable lenses, in many cases they can use the same lenses, but there are significant differences. This article will help you understand them.
For the purposes of this post, as it is mainly lenses we’re talking about, we’ll not spend time arguing the merits of one versus the other; they do the same job.
Why DSLR or mirrorless?
Versatility and image quality. Simple as that.
The ability to pick the lens that is right for the task in hand is a big plus. Although the lens on a bridge camera covers a huge focal range, there are inevitably some trade-offs to achieve that.
Their compact size usually means a smaller sensor which impacts on the camera’s ability to perform in poor light conditions and on your ability to maximise your image size.
Using a DSLR you are looking through the actual lens at your subject; bridge and compact cameras use an electronic viewfinder (EVF). They used to be pretty awful, but now they are very good indeed, however it does mean that you are not seeing the true image. Mirrorless cameras also use an EVF, but they are exceptionally good and have one advantage over the Through The Lens view of a DSLR that many people love.
Although with a DSLR you can see exactly what you are shooting, you do not know, without checking the display, whether or not you have the right exposure. You can see the settings you have applied, but not how they affect your shot. With the EVF on a Mirrorless camera the image you see takes all your settings into account and shows you how the final image will look. With a Mirrorless it is almost impossible to over or underexpose your shot.
So, on the assumption that you’re using a DSLR or Mirrorless and want to cover all eventualities, what should you take?
In practical terms, you should be able to manage with 3 lenses, maybe just 2. Any more than that and not only does weight become an issue but you’ll waste too much time faffing about changing lenses or deciding which one to use.
If you can cover focal lengths from about 20mm to 400mm you won’t miss out on much. If you like photographing birds then you may want to stretch out that longer length to 500mm or 600mm.
70-200mm zoom
One of the most popular lenses, for both professionals and enthusiasts is a 70-200mm zoom. The 70-200mm lens is a flagship lens for companies like Nikon and Canon; consequently they are very well built and capable of terrific results.
No disrespect intended to users of Sony, Fujifilm or OM System; I am sure they are able to offer lenses of comparable focal lengths to those I am suggesting.
So, this is the lens we’d put at the heart of our selection and one that will probably be on your camera for a large part of your safari.
A lot of people think that shooting wildlife requires really long lenses; usually it doesn’t. What is does require is flexible lenses, and the 70-200mm is one of the most flexible.
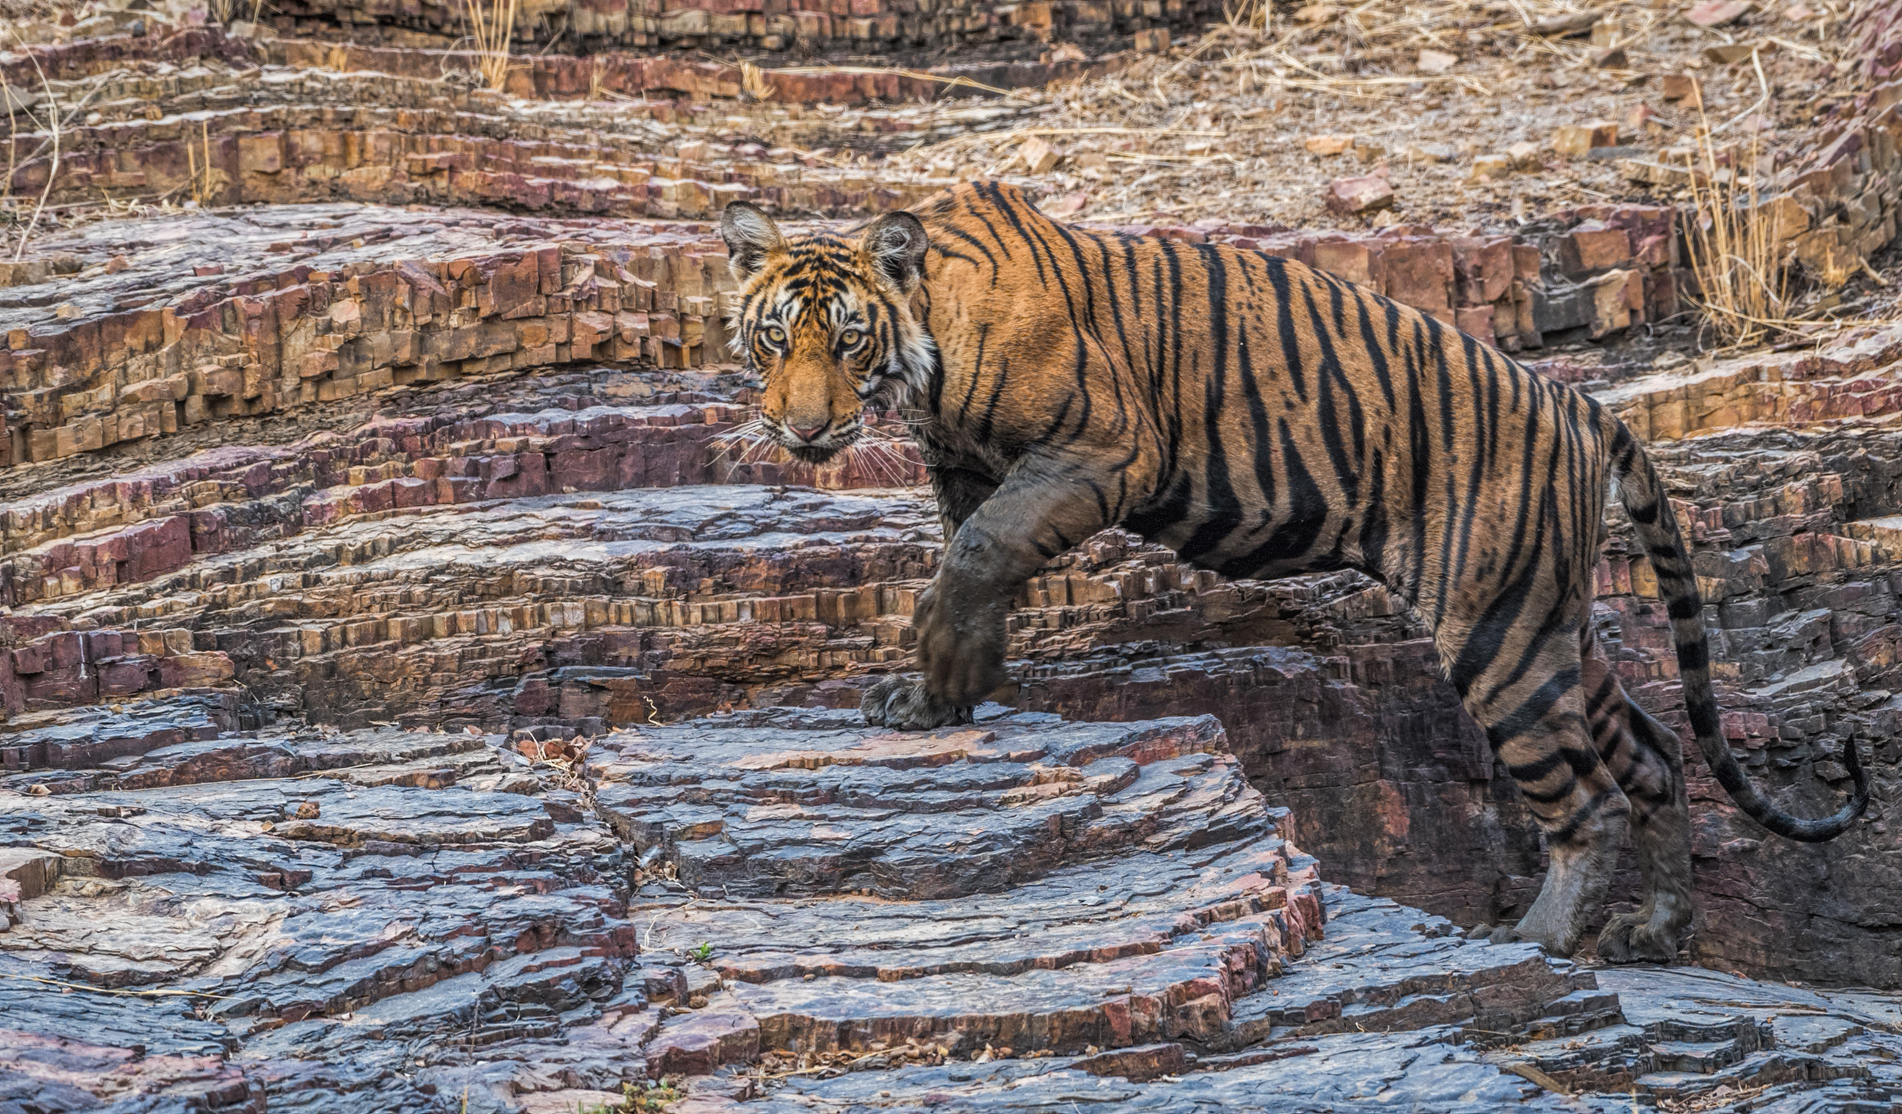
A lot of people are surprised by just how close you can get to large animals like deer, bears, elephants and sometimes – if you’re lucky – tigers.
Far better to use a slightly shorter focal length than you need and then crop, than have too long a focal length and not be able to get your whole subject in the frame. Remember animals will often move while you are watching them so leave some space in your frame to allow for this. Think ahead, don’t find yourself needing to change lenses when you should be taking photographs.
The other big advantage of the 70-200mm lens is that it is relatively fast; either f2.8 or f4. That is a big help in situations where the light is poor. A lot of animals only become active in the late afternoon and with the sun going down fast, the light deteriorates quickly. If you want to keep shooting, you’ll need to be able to open up the aperture and increase the ISO just to allow you a reasonably fast shutter speed. In areas where there are a lot of trees or dense bush, your subject may not be out in the open. A lot of National Parks in India are covered with areas of dense forest and your subjects are likely to be in shade rather than open sunlight; even with a wide aperture you will often still need an ISO setting of 1600 or more.
OK, so we’ve got one lens sorted, but 70mm is not wide enough for a lot of situations and 200mm is not long enough for subjects like birds.
Wider
India borders one of the World’s great mountain ranges, the Himalaya. If you want your photos do do justice to the magnificent panoramas then you’ll need to be able to go wide.
Having a good wide angle lens is also invaluable when the action is really close, or if you can’t get enough distance from your subject.
Once again a zoom lens works well. Something like a 24-70mm fits neatly with the 70-200mm.
For a bit more versatility you could opt for an 28-120mm lens. This gives you a bit of overlap and means that you won’t need to change lenses quite so often.
Either one of these will serve you well when you are close to the big mammals like elephants at a waterhole.
Longer
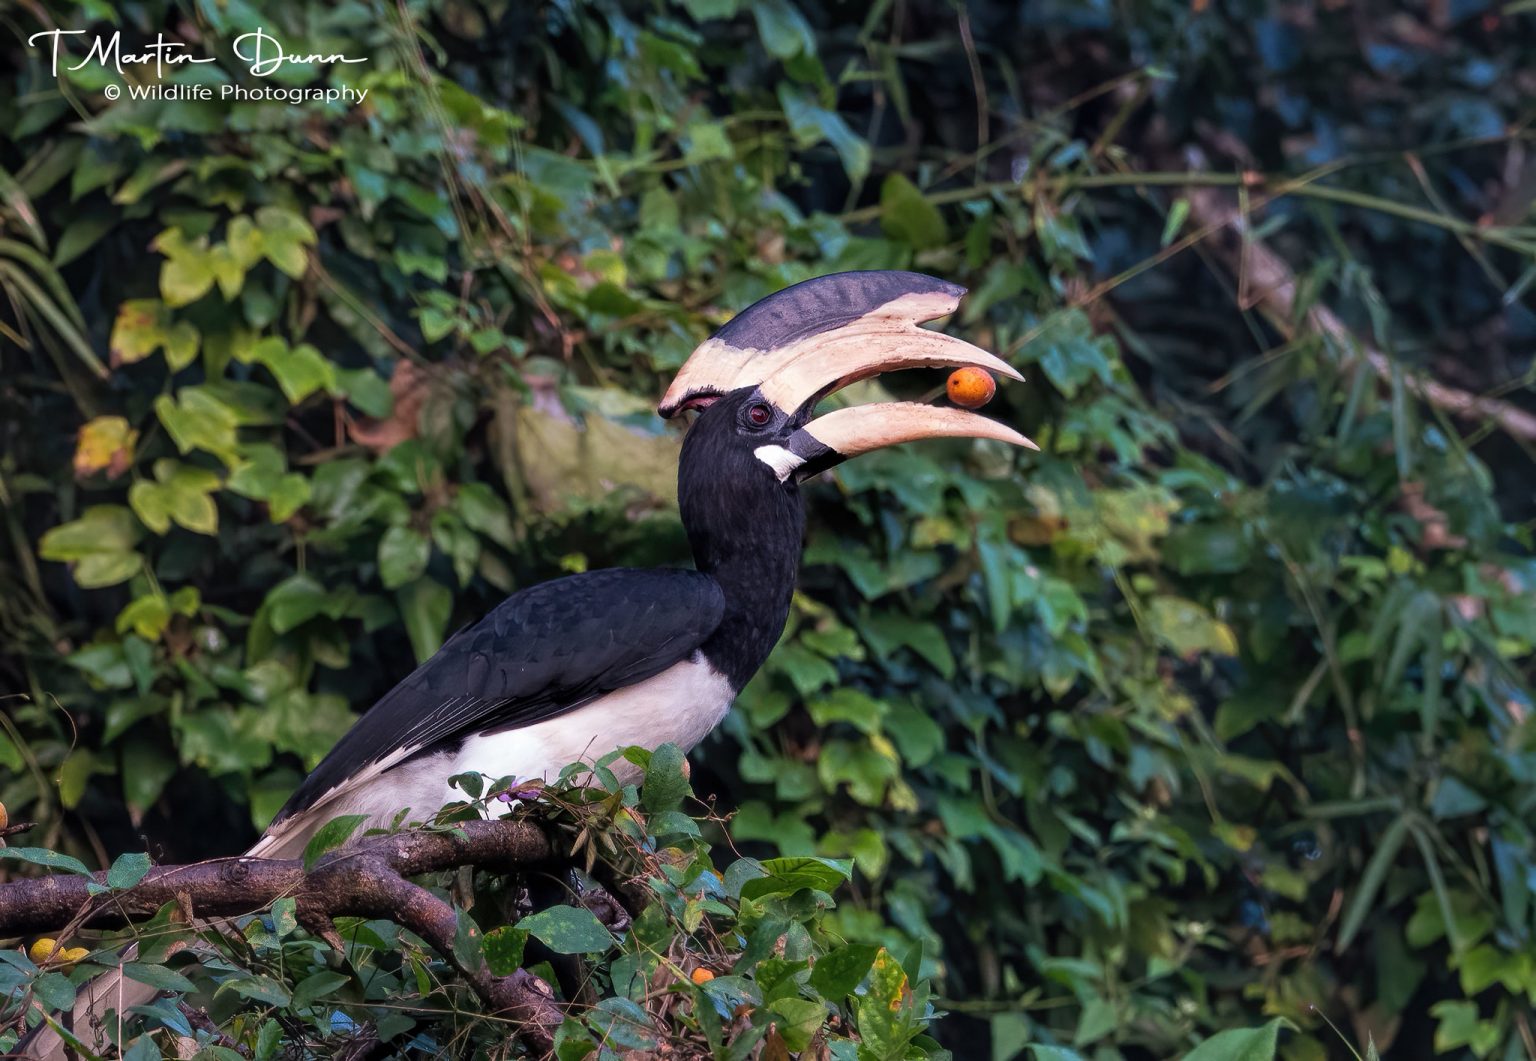
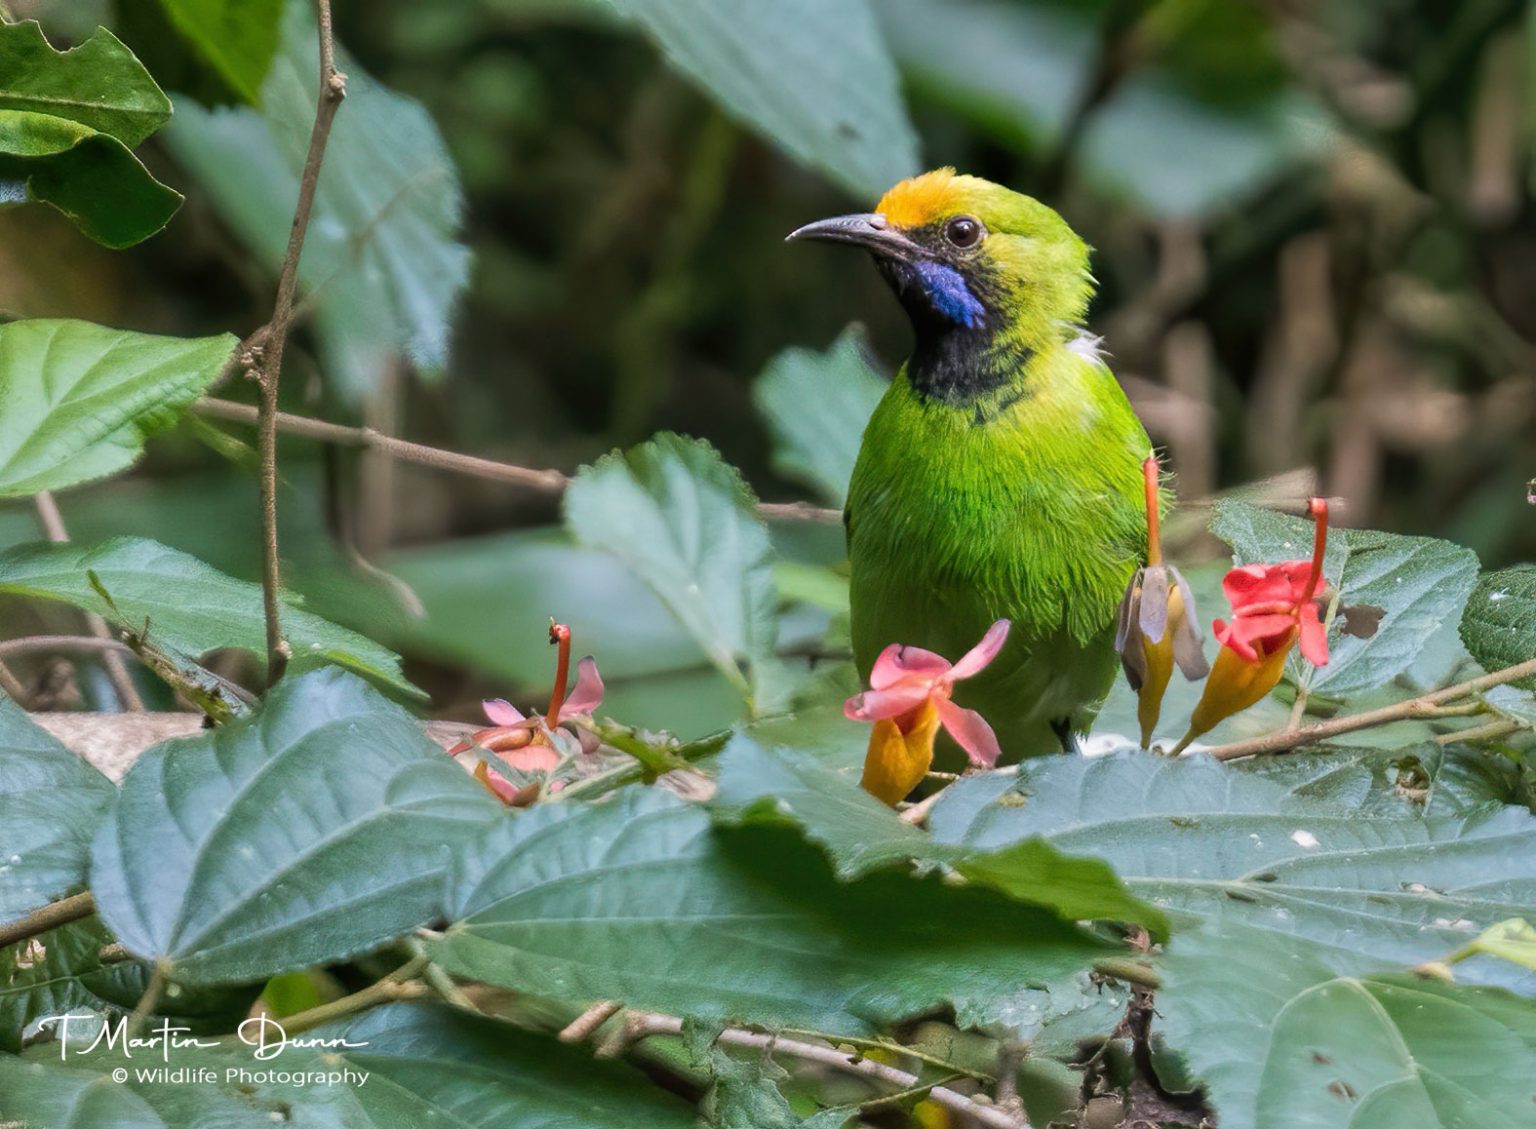
Most of your wildlife shots in India are likely to use a focal length of 300mm or less, but there will be times when you need more reach; either for that distant tiger or if you want to capture the splendidly colourful birdlife all around you, which will as often as not be high in the forest canopy.
In this regard a zoom lens with a medium to long range is ideal. Often referred to as a ‘superzoom’ these lenses could be 100-400mm, 200-500mm, 150-600mm or something similar. In addition to the lenses made by your camera manufacturer, Tamron & Sigma both offer 150-600mm lenses that can fit most brands.
These lenses are capable of excellent image quality and could be one of the only 2 lenses you will need. The main drawback of these superzooms is that they can start to get heavy if you have to carry them for any length of time.
Nikon users may prefer to stick with the brand and choose their 200-500mm zoom, which is just over £1,000 and delivers incredible images for the price. If you’ve moved across to mirrorless then you should definitely take a look at the Nikkor 180-600mm lens, it is superb and the price is very affordable.
Similarly Canon users have a couple of excellent super zooms available: The 100-500mm USM and the 200-800mm USM, which is actually cheaper than its shorter stable mate.
Sony too have a super zoom, the FE 200-600mm OSS which is surprisingly reasonably priced.
If weight is a key issue and you are a Nikon user, they do have a 18-300mm lens for around £650. It is not the most robust construction but it is light, easy to use and delivers excellent images.
Summary
Please note, that these are just suggestions for a selection of lenses that will cover most situations; take these lenses and you won’t miss out on many shots. They are not by any means the only options and specific situations may benefit from different choices.
If you take just 2 lenses and are also able to take 2 bodies, then you can go through your whole safari without needing to change lens.
My ‘compact’ kit is 1 full frame body, 1 crop frame body, a 28-120mm lens and a 200-500mm lens. That gives me a range from 28mm right up to 750mm (500mm lens on crop frame body)
With 3 lenses you should put the lens you will use the most on the body you like best with the second most used lens on the other body. You will only need to change to the 3rd lens in exceptional situations.
Think carefully before you buy new lenses
Don’t feel that you must rush out to buy a new lens just for your safari. Think about your ongoing photography needs; how much will you use it when your safari is over? Far better to buy lenses that you’ll use on an everyday basis; even with a relatively short zoom lens, like an 28-120mm, you’ll still get plenty of great shots on safari.
It is also worth mentioning that you can get some excellent lenses at terrific prices by buying second hand. You should always buy the best lens you can afford; if you buy a cheap lens it is quite probably you won’t like the results and will want to upgrade it before too long.
Buying a lens online at the cheapest price sounds appealing but you won’t know what you’re getting until it arrives. Wherever possible we recommend that you visit your nearest photographic dealer and try the lens on your camera body to see how it feels. Take a few sample shots as well.
What else?
Well, 2 bodies are better than 1. Just the ability to have 2 lenses of different focal lengths mounted and ready to go is a big help. It also means that in the unlikely event of camera failure, you have backup.
With 2 bodies you could choose just 2 lenses to cover pretty much the entire range from 24mm – 600mm and never need change lenses during your trip.
Peripherals
Some kind of support is useful to have. Whether it is a tripod, monopod or something as simple as a bean bag, anything that helps keep your camera steady will make it easier to get sharper images.
Don’t forget spare batteries, memory cards, a blower and a lens brush – dust is your camera’s biggest enemy on safari.
If you are thinking of buying new (or used) lenses for your upcoming safari then this article is worth reading.
Best lenses for wildlife photography
I should probably have made a bigger deal about the dust. Dust is a nightmare in Indian parks for most months of th eyear they are accessible. At the end of a game drive you’ll usually find your clothing and all your gear covered with dust.
You shoud avoid changing lenses if at all possible; even if your vehicle is not moving there will be others close by that are and you cannot avoid their dust.
Check and clean your gear when you get back to camp/lodge after every outing.
I made a double jump recently; I splashed out on a Nikon Z8 and entered the world of mirrorless photography.
I won’t pretend it wasn’t a steep learning curve; probably made steeper by the fact that I had been using the same kit for several years and was very familiar with it. The EVF in particular took some getting used to.
The other big difference was moving from crop frame to full frame. It made me re-evaluate the lenses I have and the ones I choose for a particular trip.
My aim has long been to try and pick camera/lens combinations that mean I will not need to change lenses while in the field; often not at all during a trip.
So here’s what is currently in my bag for safaris.
2 bodies: Z8 & D500
FTZ adaptor
3 lenses: 500mm pf telephoto, 70-200mm zoom, 24-120mm zoom
The 500mm lens is attached to the Z8. That gives me 500mm full frame and 750mm is I switch to crop frame, with a pixel count very nearly the same as my D500 + 500mm pf.
The 70-200mm is attached to the D500, giving me an effective range of 105-300mm
The short zoom stays in my bag for those occasions when I need something wider.
So far I have not come across a situation which this combination cannot handle.